Why You'll Love It
- - Simple, no‑bake assembly
- - Fresh strawberry flavor shines
- - Oreo crust adds satisfying crunch
- - Perfect for make‑ahead parties
*"These bars reminded me of my grandma’s kitchen, sweet and perfectly balanced."*
Essential Ingredient Guide
- Cream cheese: Choose full‑fat for richness; let it soften at room temperature for a smooth blend.
- Fresh strawberries: Hull and puree them; the natural acidity balances the sweetness of the crust.
- Oreo cookies: Crush finely; they form the buttery base that holds the bars together.
- Granulated sugar: Sweetens the filling without overwhelming the fruit notes.
- Lemon juice: A splash brightens the strawberry puree and stabilizes the texture.
- Vanilla extract: Adds depth; a little goes a long way.
Complete Cooking Process
-
Ingredient Readiness:
Soak crushed Oreos with melted butter, soften cream cheese, and puree strawberries while the crust sets.
-
Flavor Development:
Blend cheese, sugar, vanilla, and lemon juice, then swirl in strawberry puree for a marbled effect.
-
Texture Control:
Press the Oreo crust firmly into a pan, then spread the cheesecake layer to an even thickness.
-
Finishing Touches:
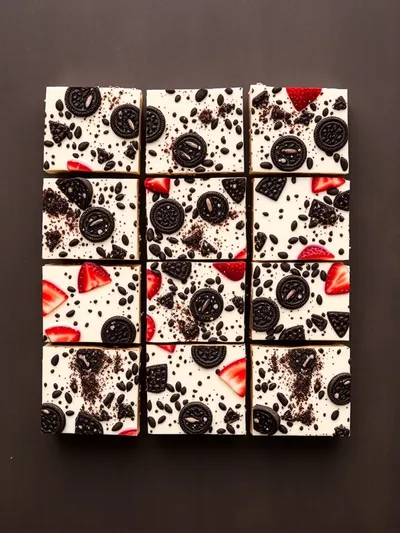
Top with fresh strawberry slices and a light dusting of crushed Oreo for visual appeal.
-
Serving Timing:
Chill for at least 4 hours; serve cold for the best sliceable texture.
- Use a food processor for uniformly fine Oreo crumbs.
- Let the bars rest overnight for flavors to meld.
- Gently tap the pan after adding the filling to release air bubbles.
- Slice with a warm knife for clean edges.
Pro Tips
Well, after you’ve followed these little hints, you’ll notice how the bars hold together without cracking. It feels like the kitchen has given you a little secret, a moment of calm when the butter scent rises and the strawberries glisten. Honestly, that’s the reward of taking the time.
The essence of the dish:
A fun fact or historical angle:
Flavor or sensory focus:
You Must Know
- Keep the crust cold before adding filling.
- Do not over‑mix the cheesecake blend.
- Chill long enough for clean slices.
Frequently Asked Questions
→ Can I use frozen strawberries?
Yes, thaw them fully and drain excess liquid before pureeing to avoid a watery filling.
→ Is there a gluten‑free option?
Replace Oreo cookies with a gluten‑free chocolate cookie version and use a gluten‑free butter alternative.
→ How long can the bars be stored?
Keep them refrigerated in an airtight container for up to 3 days; they stay fresh and firm.
→ Can I make them ahead of time?
Absolutely, assemble them a day before serving; they actually taste better as the flavors meld.
→ What garnish works best?
A light drizzle of melted white chocolate and a few fresh strawberry slices add visual appeal.
→ Do I need a springform pan?
A simple 8×8 inch pan lined with parchment works perfectly; no springform needed.
Chef's Tips
If the crust feels too dry, add a teaspoon more melted butter.,For a richer flavor, swirl a bit of chocolate ganache into the filling.,Store bars in a single layer within the pan to avoid moisture transfer.
Nutrition Facts
per serving
210
Calories
4g
Protein
22g
Carbs
12g
Fat
Taste Profile
A balanced blend of sweet fruit and creamy cheese with a subtle buttery crunch.
Ingredient Substitutions
Don't have an ingredient? Try these alternatives
Maintain the same ratio; ensure they are finely crushed.
Blend longer for a smooth texture; adjust sugar to taste.
Recipe Variations
Try these delicious twists on the original
Chocolate Strawberry
Add a swirl of melted dark chocolate into the filling before chilling.
Lemon Zest
Incorporate finely grated lemon zest for a brighter citrus note.
Common Mistakes to Avoid
Learn from others' mistakes for perfect results
- Over‑mixing the cream cheese which results in grainy texture.
- Pressing the crust too loosely, causing it to crumble.
- Not chilling long enough, leading to soft, difficult-to‑slice bars.
Meal Prep & Storage
Make Ahead Tips
You can crush the Oreo crust and press it into the pan up to 24 hours ahead; keep wrapped in the fridge. Assemble the filling later and chill as directed.
Leftover Ideas
Refrigerate any leftover bars; enjoy within three days. For a quick snack, let a bar sit at room temperature for five minutes before eating.
Perfect Pairings
Serve this with...
Cooking Timeline
Prepare crust by mixing crushed Oreos with melted butter and pressing into pan.
Beat cream cheese, sugar, vanilla, lemon juice; fold in strawberry puree.
Spread filling over crust, garnish with strawberries and extra crumbs.
Cover and refrigerate for at least 4 hours.
Slice into bars and serve chilled.
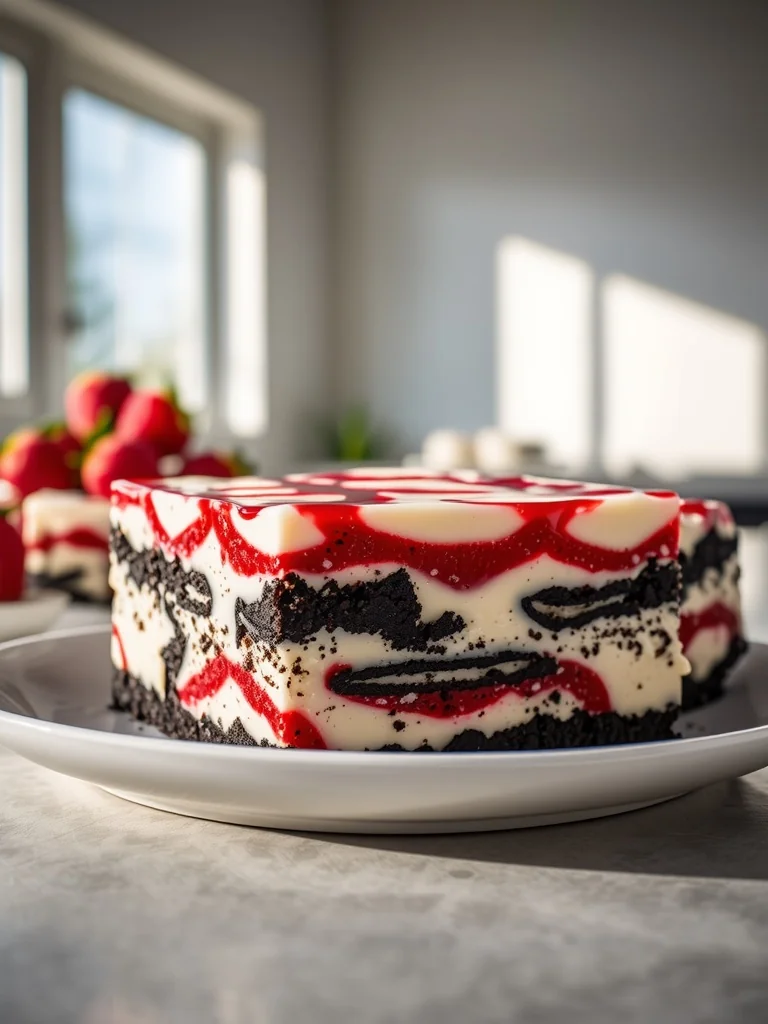
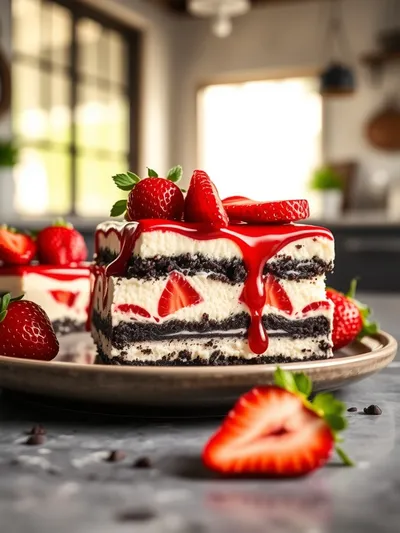
Strawberry Oreo Cheesecake Bars
These Strawberry Oreo Cheesecake Bars blend sweet strawberry puree with the familiar crunch of Oreo crumbs, creating a creamy, velvety bar that feels like a garden in summer and a nostalgic cookie moment all at once. Perfect for a quiet afternoon tea or a festive gathering, each bite delivers a gentle sigh of buttery crust, tangy cream cheese, and bright fruit.
Timing
Prep Time
20 Minutes
Cook Time
0 Minutes
Total Time
4 Hours 20 Minutes
Recipe Details
Ingredients
Crust
- 01 2 cups Oreo cookies, crushed
- 02 5 tbsp unsalted butter, melted
Filling
- 01 16 oz cream cheese, softened
- 02 1/2 cup granulated sugar
- 03 1 tsp vanilla extract
- 04 2 tbsp lemon juice
- 05 1 cup fresh strawberries, pureed
- 06 1 tbsp heavy cream (optional for silkier texture)
Topping
- 01 Fresh strawberry slices
- 02 Additional crushed Oreo cookies
Instructions
Preheat your mind to a calm place, then line an 8×8 inch pan with parchment paper.
Combine crushed Oreos with melted butter; press the mixture firmly into the pan, creating an even base. Let it set while you prepare the filling.
In a large bowl, beat cream cheese, sugar, vanilla, and lemon juice until smooth. Gently fold in strawberry puree (and heavy cream if using) until just combined.
Spread the cheesecake layer over the crust, smoothing the top. Sprinkle extra crushed Oreos and arrange strawberry slices decoratively.
Refrigerate for at least 4 hours, preferably overnight, until firm. Cut into bars and serve chilled.
Notes & Tips
- 1 If the crust feels too dry, add a teaspoon more melted butter.
- 2 For a richer flavor, swirl a bit of chocolate ganache into the filling.
- 3 Store bars in a single layer within the pan to avoid moisture transfer.
Tools You'll Need
-
8×8 inch baking pan
-
Food processor or zip‑top bag & rolling pin
-
Mixing bowl
-
Hand mixer or spatula
-
Parchment paper
Must-Know Tips
- Don't over‑mix the cream cheese; it can become grainy.
- Let the bars chill thoroughly; this prevents crumbling.
- Use a warm knife for clean slices.
Professional Secrets
- Room temperature cream cheese ensures a silky texture.
- Press the crust firmly to avoid gaps.
- Chill the bars uncovered for the first hour to develop a dry surface.
Recipe by
Valentina MorettiChef Valentina Moretti developed her passion for baking while growing up near traditional European bakeries. She focuses on classic pastries like croi ...
Get Delicious Recipes Weekly
Join 25,000+ home cooks getting our best recipes straight to their inbox.
Free forever • No spam • Unsubscribe anytime