Why You'll Love It
- - Ready in under 30 minutes, perfect for busy mornings
- - Simple ingredients that you likely already have
- - Light cream cheese filling adds just the right richness
- - Fresh strawberries bring bright acidity and color
“Absolutely perfect—flaky, sweet, and the strawberries taste like they were just picked.”
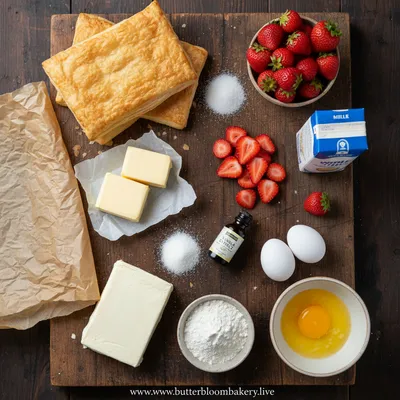
Essential Ingredient Guide
- All‑purpose flour: Choose a brand with good protein content; it helps create that tender, flaky crumb.
- Unsalted butter: Cold, cubed butter is essential for those distinct layers.
- Fresh strawberries: Look for bright red, fragrant berries; they provide natural sweetness and a pop of color.
- Cream cheese: Room‑temperature cheese blends smoothly, giving the filling a silky texture.
- Lemon zest: A tiny amount lifts the berries, balancing the butter’s richness.
- Granulated sugar: Adds a subtle sparkle to the pastry and helps the topping caramelize.
Complete Cooking Process
-
Ingredient Readiness:
Measure flour, chill butter, and slice strawberries before you even turn on the oven.
-
Flavor Development:
The butter layers melt together during baking, releasing a buttery aroma that fills the kitchen.
-
Texture Control:
Rolling and folding the dough creates air pockets, giving the pastry its light, airy bite.
-
Finishing Touches:
Add the strawberry topping and a dusting of sugar just before the final minutes of baking.
-
Serving Timing:
Let the danish cool slightly; the filling sets and the berries stay juicy.
- Keep all ingredients cold for optimal lamination.
- Don’t over‑bake; a light golden hue signals it’s done.
- Brush the top with a little melted butter for extra shine.
- Serve warm for the best flavor experience.
Pro Tips
Honestly, these little tweaks make a world of difference. I remember once pulling a batch out too early—yeah, the layers weren’t fully set, and it felt a bit doughy. Now I watch that golden edge and trust the scent. It’s a gentle reminder that patience, even in a quick recipe, pays off.
The essence of the dish:
A fun fact or historical angle:
Flavor or sensory focus:
You Must Know
- Work quickly to keep butter cold
- Use ripe but firm strawberries
- Don’t skip the final sugar glaze
Frequently Asked Questions
→ Can I use frozen strawberries?
Yes, but thaw and pat them dry first to avoid a soggy topping.
→ How do I keep the butter from melting while rolling?
Chill the dough for at least 15 minutes between folds and work in a cool kitchen.
→ Can I make this ahead of time?
Absolutely—assemble the danish, freeze, then bake straight from frozen, adding a few extra minutes.
→ What if I don’t have cream cheese?
A soft goat cheese works nicely, offering a tangy twist.
→ Is this recipe gluten‑free?
Swap the all‑purpose flour for a gluten‑free blend, but the texture will be slightly different.
→ How long does it stay fresh?
Store in an airtight container for up to two days; reheat gently to restore crispness.
Chef's Tips
If the dough feels too soft, return it to the fridge for a few minutes.,Pat the strawberries dry to prevent excess moisture.,A light glaze of apricot jam adds a subtle shine.
Nutrition Facts
per serving
310
Calories
5g
Protein
28g
Carbs
18g
Fat
Taste Profile
Buttery with bright strawberry notes
Ingredient Substitutions
Don't have an ingredient? Try these alternatives
Texture may be slightly less flaky.
Provides tangy flavor; reduce sugar slightly.
Recipe Variations
Try these delicious twists on the original
Spicy Version
Add a pinch of cayenne pepper to the cream cheese mixture for a gentle heat.
Mediterranean Style
Swap strawberries for thinly sliced figs and sprinkle crumbled feta before baking.
Common Mistakes to Avoid
Learn from others' mistakes for perfect results
- Over‑working the dough, which can make it tough.
- Baking at too low a temperature, leading to soggy layers.
- Using overly juicy strawberries, causing a soggy bottom.
Meal Prep & Storage
Make Ahead Tips
Prepare the dough and freeze it in a sealed bag; assemble and bake straight from frozen for a fresh‑out-of‑the‑oven treat.
Leftover Ideas
Reheat gently in a skillet over low heat, covered, to restore crispness without drying out.
Perfect Pairings
Serve this with...
Cooking Timeline
Gather and measure all ingredients; preheat oven.
Mix flour, sugar, and salt; cut in butter and form dough.
Roll, fold, and chill the dough for lamination.
Prepare cream cheese filling and slice strawberries.
Assemble danish, brush with butter, bake, then cool slightly.
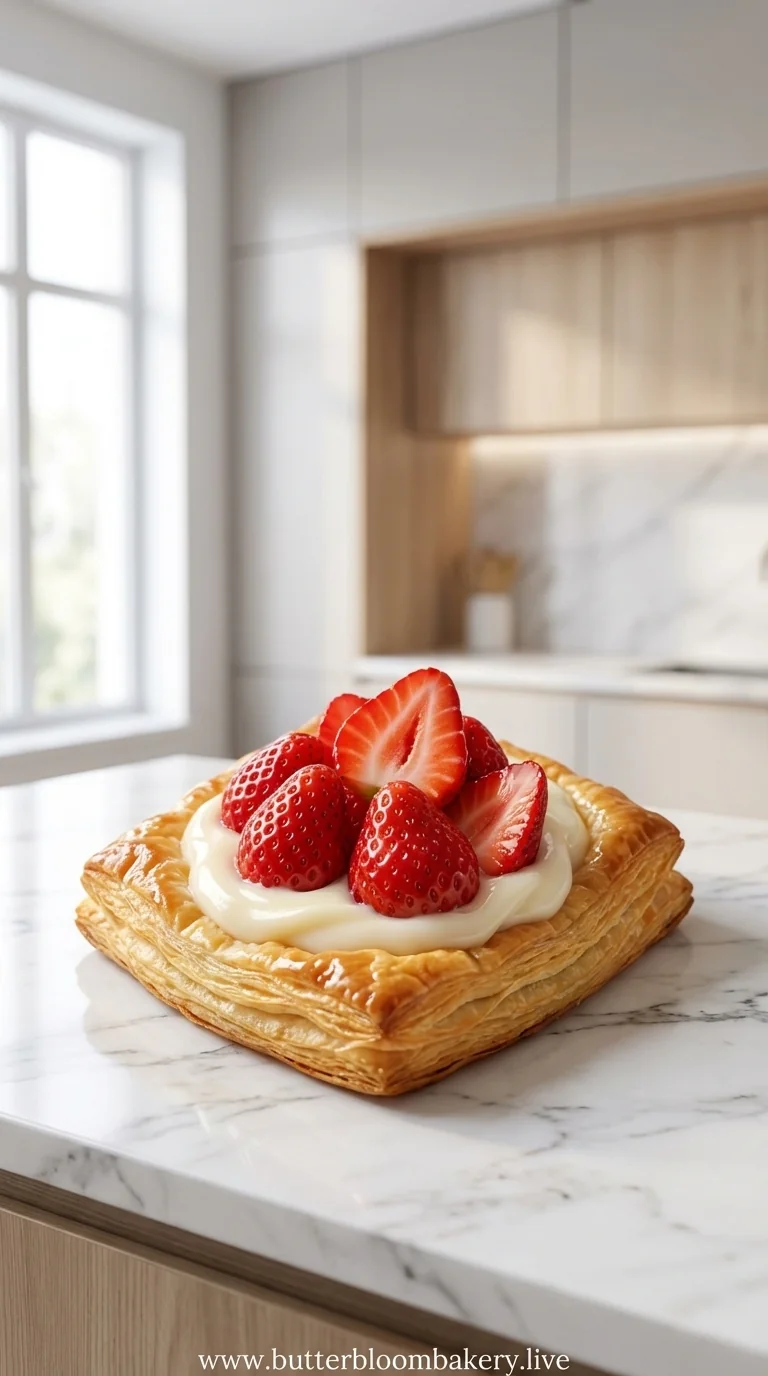
Quick & Easy Strawberry Danish
A flaky, buttery pastry crowned with sweet, juicy strawberries and a light cream cheese filling. Honestly, it’s the kind of breakfast that feels like a small celebration. strawberry danish recipe.
Timing
Prep Time
15 Minutes
Cook Time
20 Minutes
Total Time
35 Minutes
Recipe Details
Ingredients
Pastry Dough
- 01 2 cups all‑purpose flour
- 02 1/2 cup cold unsalted butter, cubed
- 03 1/4 cup ice‑cold water
- 04 1 tbsp sugar
- 05 1 tsp salt
Filling & Topping
- 01 4 oz cream cheese, softened
- 02 2 tbsp powdered sugar
- 03 1 tsp vanilla extract
- 04 1 cup fresh strawberries, sliced
- 05 1 tbsp lemon zest
- 06 1 tbsp melted butter (for brushing)
- 07 Extra sugar for sprinkling
Instructions
In a bowl, whisk flour, sugar, and salt; cut in cold butter until the mixture resembles coarse crumbs.
Add ice water gradually, mixing just until the dough comes together. Form into a disk, wrap, and chill for 15 minutes.
Roll the dough on a lightly floured surface into a rectangle, fold into thirds, rotate, and repeat two more times for lamination.
Combine cream cheese, powdered sugar, and vanilla until smooth; spread a thin layer over the rolled dough.
Arrange sliced strawberries on top, sprinkle lemon zest, and fold the dough into a rectangle, sealing the edges.
Brush the surface with melted butter, dust with extra sugar, and bake at 400°F (200°C) for 18‑20 minutes until golden.
Let the danish cool slightly; serve warm, perhaps with a dollop of whipped cream. whipped cream puff link.
Notes & Tips
- 1 If the dough feels too soft, return it to the fridge for a few minutes.
- 2 Pat the strawberries dry to prevent excess moisture.
- 3 A light glaze of apricot jam adds a subtle shine.
Tools You'll Need
-
Rolling pin
-
Pastry brush
-
Mixing bowl
-
Sharp knife
-
Baking sheet
-
Parchment paper
Must-Know Tips
- Don’t over‑mix the dough; it stays tender.
- Keep butter cold to achieve proper flakiness.
- Taste the filling before spreading; adjust sweetness.
Professional Secrets
- Use ice water; it prevents butter from melting during mixing.
- Fold the dough like a letter to create distinct layers.
- Brush with butter just before baking for a glossy finish.

Recipe by
Amelia HartChef Amelia Hart is a talented cake designer who loves creating beautiful celebration cakes for special moments. She specializes in layered cakes, cre ...
Get Delicious Recipes Weekly
Join 25,000+ home cooks getting our best recipes straight to their inbox.
Free forever • No spam • Unsubscribe anytime