Why You'll Love It
- - No‑bake, so it’s perfect for warm days.
- - The peanut butter adds a smooth, nostalgic richness.
- - Crunchy Butterfinger pieces give an indulgent texture.
- - Simple pantry ingredients you likely already have.
*"The creamy filling and crunchy topping are a match made in heaven, my kids can’t get enough!"*
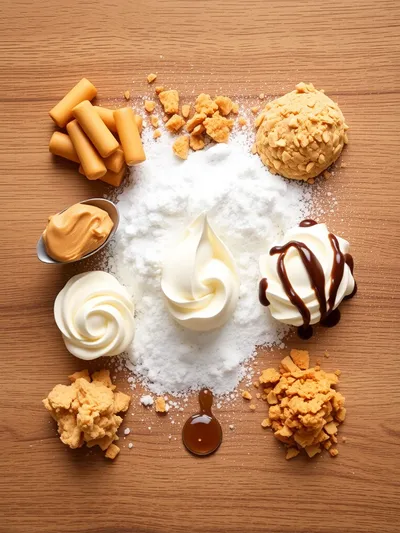
Essential Ingredient Guide
- Butterfinger bars: Choose fresh, crisp bars; crumble them just before assembling for maximum crunch.
- Peanut butter: Use creamy, unsweetened peanut butter to balance the candy’s sweetness.
- Whipped cream: Lightly sweetened whipped cream lifts the filling and adds airy texture.
- Chocolate chips: Melt them gently; they create a glossy glaze that ties the flavors together.
- Heavy cream: Used for the ganache; it adds silkiness without overwhelming the pie.
- Vanilla extract: A dash deepens the buttery aroma and rounds the palate.
Complete Cooking Process
-
Ingredient Readiness:
Measure and soften the butter, crumble the bars, and chill the crust base.
-
Flavor Development:
Blend peanut butter with cream cheese and vanilla until smooth, then fold in whipped cream.
-
Texture Control:
Spread the filling, then sprinkle the crumbled Butterfinger; press gently for even layers.
-
Finishing Touches:
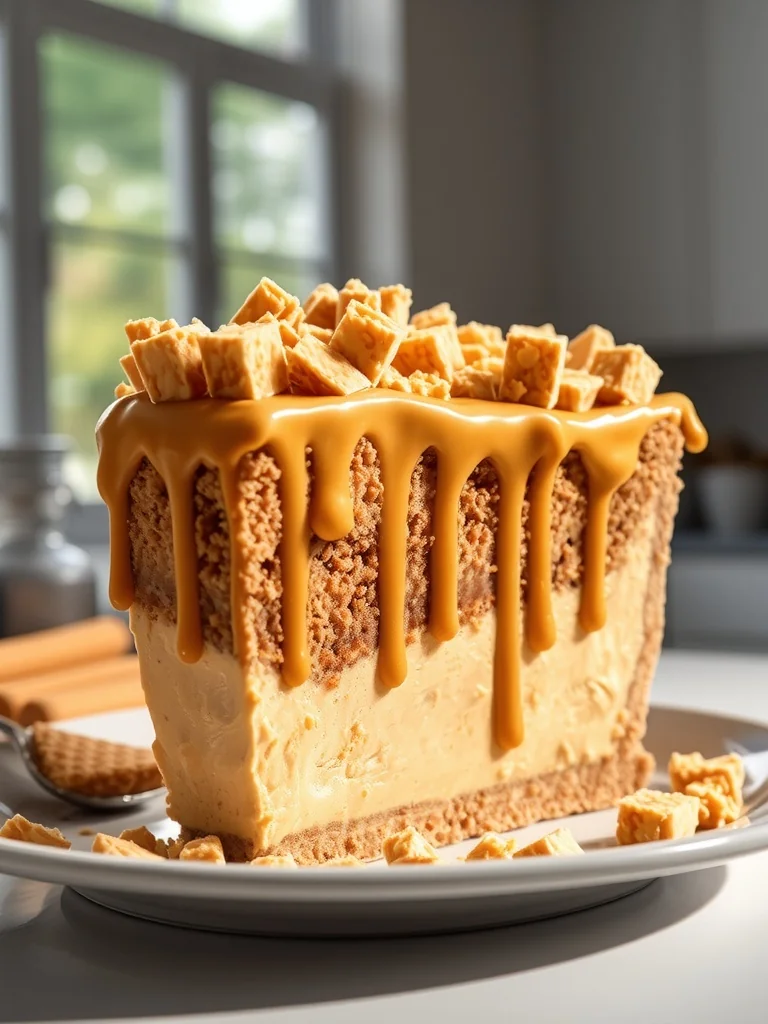
Drizzle warm chocolate ganache over the top and let it set in the fridge.
-
Serving Timing:
Allow the pie to chill at least 2 hours; serve cool for the best bite.
- Keep the crust chilled while you work to avoid sogginess.
- Use a rubber spatula to fold in whipped cream without deflating it.
- Add a pinch of sea salt to the ganache for contrast.
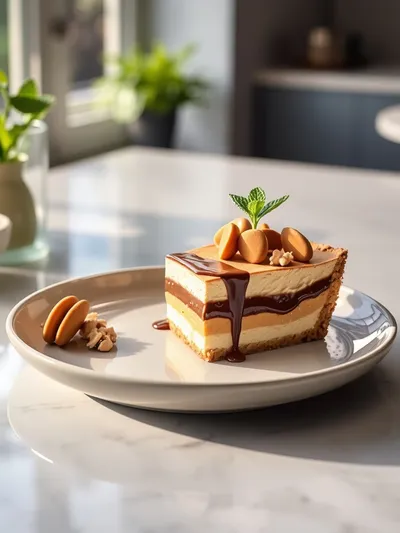
- Garnish with a few whole Butterfinger pieces for visual appeal.
Pro Tips
Well, these small adjustments make a big difference. I often find that a little patience while chilling lets the flavors meld, and the final slice feels like a little celebration. It's those tiny, thoughtful touches that turn an ordinary dessert into a memory.
The essence of the dish:
A fun fact or historical angle:
Flavor or sensory focus:
You Must Know
- Use chilled cream cheese for a firm filling.
- Don’t over‑mix the ganache; it should stay glossy.
- Serve cold for the best texture contrast.
Frequently Asked Questions
→ Can I make this pie gluten‑free?
Yes, substitute the crust with a gluten‑free graham cracker base or use crushed almond flour mixed with butter.
→ How long can leftovers be stored?
Keep refrigerated in an airtight container for up to 3 days; the texture remains pleasant.
→ Can I add a salty element?
A light sprinkle of flaky sea salt on the ganache adds a wonderful contrast.
→ Is this suitable for vegans?
Replace dairy ingredients with vegan cream cheese, coconut cream, and dairy‑free chocolate.
→ What other candies work in place of Butterfinger?
Try Crunch bars, Snickers, or even chocolate‑covered pretzel bites for a different crunch.
→ Do I need to bake the crust?
No, this is a no‑bake pie; just press the crust mixture into the pan and chill.
Chef's Tips
If the crust feels too soft, add a little more butter.,For extra crunch, layer some Butterfinger pieces between the filling and ganache.,A quick tip: warm the ganache slightly before drizzling for a smooth ribbon.
Nutrition Facts
per serving
420
Calories
7g
Protein
38g
Carbs
28g
Fat
Taste Profile
A rich, sweet chocolate‑nut butter indulgence
Ingredient Substitutions
Don't have an ingredient? Try these alternatives
Adjust quantity to maintain crunch level.
Will add a faint coconut note to the ganache.
Recipe Variations
Try these delicious twists on the original
Spicy Version
Add a pinch of cayenne pepper to the ganache for a subtle heat.
Mediterranean Style
Swap chocolate chips for dark chocolate and garnish with toasted sesame seeds.
Common Mistakes to Avoid
Learn from others' mistakes for perfect results
- Over‑mixing the filling, which can deflate the whipped cream.
- Pouring hot ganache over a warm filling, causing it to melt.
- Skipping the chill step, resulting in a soggy crust.
Meal Prep & Storage
Make Ahead Tips
The crust and filling can be prepared a day ahead; keep the ganache separate until just before serving.
Leftover Ideas
Refrigerate slice leftovers; enjoy within three days. Let sit at room temperature for five minutes before serving.
Perfect Pairings
Serve this with...
Cooking Timeline
Blend crust ingredients and press into pan.
Mix filling components until smooth.
Spread filling, sprinkle crushed bars.
Melt chocolate ganache and drizzle.
Chill pie in fridge to set.
Butterfinger Pie With Peanut Butter
A luscious, no‑bake Butterfinger pie that blends creamy peanut butter with crunchy chocolate‑coated bars, perfect for a sweet finish.
Timing
Prep Time
20 Minutes
Cook Time
0 Minutes
Total Time
2 Hours 20 Minutes
Recipe Details
Ingredients
Crust
- 01 1 1/2 cups graham cracker crumbs
- 02 4 tbsp melted butter
- 03 2 tbsp sugar
Filling
- 01 8 oz cream cheese, softened
- 02 1 cup creamy peanut butter
- 03 1/2 cup powdered sugar
- 04 1 tsp vanilla extract
- 05 1 cup heavy whipping cream, whipped
Topping
- 01 1 cup chocolate chips
- 02 1/4 cup heavy cream
- 03 6 Butterfinger bars, crushed
Instructions
Combine graham cracker crumbs, melted butter, and sugar; press into a 9‑inch springform pan. Chill while you prepare the filling.
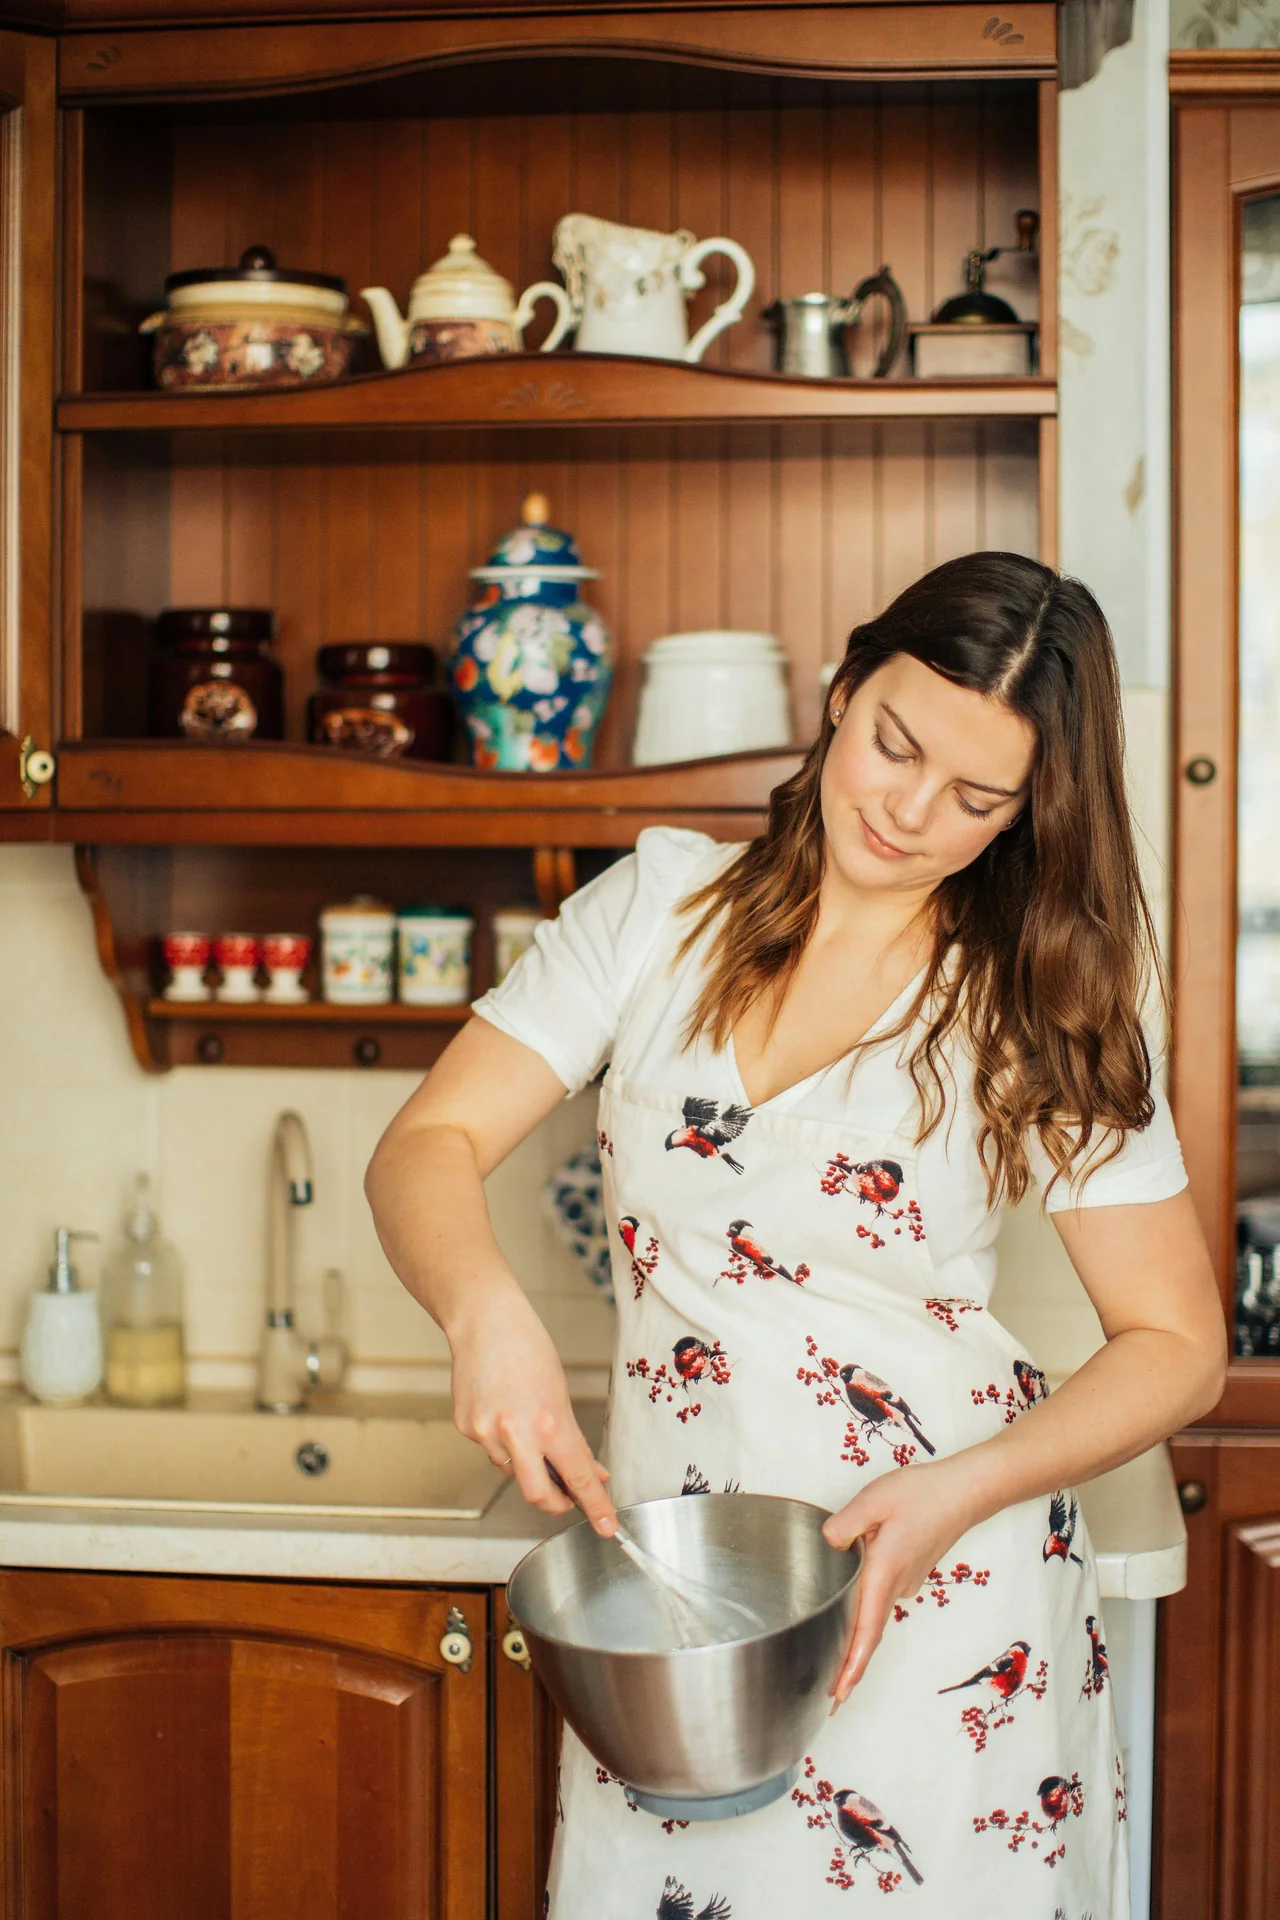
Beat cream cheese, peanut butter, powdered sugar, and vanilla until smooth. Gently fold in whipped cream until just combined.
Spread the creamy mixture over the chilled crust, then sprinkle crushed Butterfinger bars evenly on top.
Heat chocolate chips with 1/4 cup heavy cream in a microwave or double boiler, stirring until glossy. Drizzle over the pie and let set in the refrigerator for at least 2 hours.
When ready, run a thin knife around the pan edge, release the springform, slice, and serve chilled.
Notes & Tips
- 1 If the crust feels too soft, add a little more butter.
- 2 For extra crunch, layer some Butterfinger pieces between the filling and ganache.
- 3 A quick tip: warm the ganache slightly before drizzling for a smooth ribbon.
Tools You'll Need
-
Springform pan
-
Food processor
-
Mixing bowls
-
Hand mixer
-
Spatula
-
Microwave-safe bowl
Must-Know Tips
- Don't overcrowd the pan with crumbs; press gently.
- Let the ganache cool a bit before drizzling to avoid melting the filling.
- Taste the filling before adding sugar; Peanut butter varies in sweetness.
Professional Secrets
- Room temperature cream cheese ensures a silky filling.
- Warm chocolate ganache creates a glossy finish.
- Chilling the crust solidifies butter, preventing sogginess.
Recipe by
Valentina MorettiChef Valentina Moretti developed her passion for baking while growing up near traditional European bakeries. She focuses on classic pastries like croi ...
Get Delicious Recipes Weekly
Join 25,000+ home cooks getting our best recipes straight to their inbox.
Free forever • No spam • Unsubscribe anytime